I was staring at a dark, fuzzy line of mildew creeping between my tiles, thinking there was absolutely no way I could fix it without spending a fortune on a plumber. I honestly thought that caulking bathtub projects were one of those “expert-only” tasks that required a steady hand and a degree in engineering. But after one disastrous attempt that left my bathroom looking like a Jackson Pollock painting, I realized the truth: it’s not about having magic hands, it’s just about having the right process.
Forget those overly polished DIY videos where everything looks effortless and clean. I’ve spent way too many hours scrubbing, scraping, and failing so that you don’t have to. In this guide, I’m stripping away the fluff and giving you the raw, honest steps to get a professional-grade finish. I’ll show you exactly how to prep the surface, how to actually control that caulk gun without making a mess, and the one secret trick to getting those perfectly smooth lines every single time. Let’s get to work.
Table of Contents
- Step-by-Step Instructions
- Mastering the Art of Removing Old Caulk From Tub
- Silicone vs Acrylic Sealant Choosing the Best Sealant for Bathroom Tiles
- Pro Tricks to Keep Your Caulking from Looking Like Total Garbage
- The Quick Cheat Sheet for a Perfect Seal
- The Golden Rule of Bathrooms
- The Finish Line
- Frequently Asked Questions
Guide Overview
Tools & Supplies
- Caulking gun for applying sealant
- Utility knife for removing old caulk
- Plastic putty knife for scraping
- Microfiber cloth for cleaning
- Silicone caulk (1 tube)
- Caulk remover tool or chemical stripper (1 bottle)
- Rubbing alcohol for surface prep (1 small bottle)
Step-by-Step Instructions
- 1. First things first, you’ve got to get rid of that old, gross sealant. Don’t even bother trying to layer new caulk over the old stuff; it’s a recipe for a total disaster. Grab a utility knife or a specialized caulk removal tool and start scraping away that crusty, moldy mess until the surface is completely bare. It’s tedious work, but if you don’t get it all out, the new bead won’t actually stick.
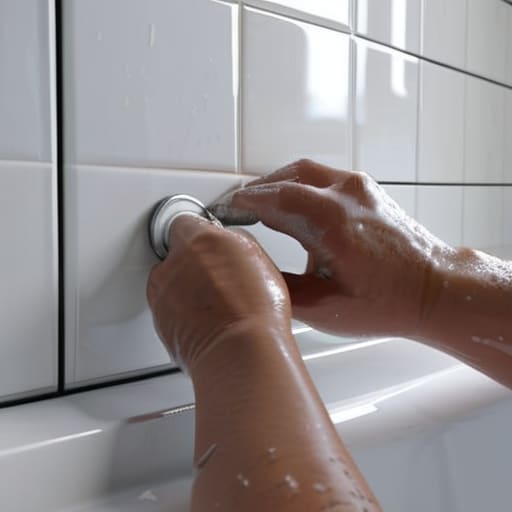
- 2. Once the old gunk is gone, you need to clean the area like your life depends on it. Use a good quality rubbing alcohol or a dedicated bathroom cleaner to wipe down the gap between the tub and the wall. You want to kill off any lingering bacteria or soap scum that’s hiding in the cracks. If the surface is even slightly greasy or damp, your new caulk is going to peel right off in a few weeks.
- 3. Now, grab a roll of painter’s tape if you aren’t feeling particularly confident in your steady hand. Run a strip of tape along the wall and another along the tub, leaving just a small, consistent gap where the caulk will go. This is basically a cheat code for getting those perfectly straight, professional-looking lines without having to spend years practicing your aim.
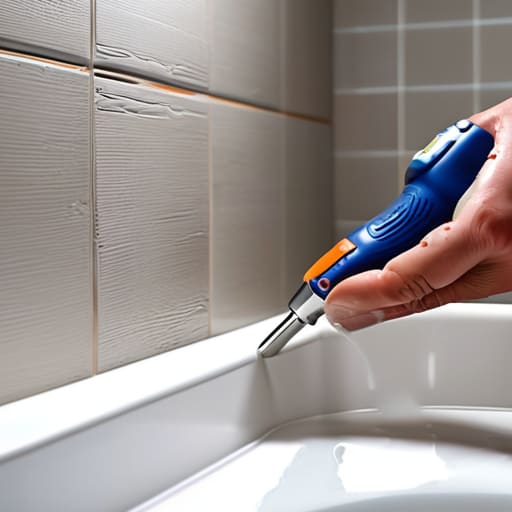
- 4. It’s time to load up the caulk gun. Cut the tip of your caulk tube at a slight angle—think of it like a tiny nozzle—so you have more control over the flow. Before you start the “real” work, squeeze a little bit out onto a piece of cardboard just to make sure the pressure is consistent and you aren’t dealing with any clogged air bubbles.
- 5. Start applying the bead. Hold the gun at a 45-degree angle and move in one smooth, continuous motion. Don’t go too fast, but don’t dawdle either, or you’ll end up with a lumpy, uneven mess. Try to keep the pressure steady so the caulk fills the gap completely rather than just sitting on top of it.
- 6. This is where the magic happens: smoothing it out. Take a damp finger (or a specialized caulking tool if you want to be fancy) and lightly run it along the bead you just laid down. This pushes the caulk into the crevices and creates that smooth, rounded finish. Just be careful not to overdo it, or you’ll end up pulling the caulk right out of the gap you just filled.
- 7. Finally, peel off that painter’s tape while the caulk is still slightly tacky. If you wait until it’s fully dried, you’re going to rip chunks of the new sealant right off the wall. Once the tape is gone, you’ll have those crisp, clean lines that make your bathroom look like it was done by a pro. Now, step away and let it cure for at least 24 hours—no showers allowed!
Mastering the Art of Removing Old Caulk From Tub
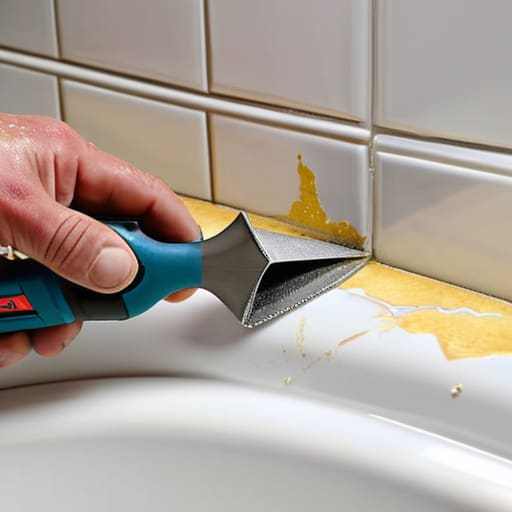
Look, I’ll be real with you: this is the part everyone dreads, but you absolutely cannot skip it if you want the job to last. If you just smear new beads over the old stuff, you’re basically building a house of cards. The new layer won’t bond, and you’ll be right back in this same mess in three months. When you’re removing old caulk from tub edges, don’t just hack at it blindly. Grab a sharp utility knife or a dedicated caulk removal tool and work slowly. You want to slice along the seam where the tub meets the wall to break that initial seal, then gently peel the strips away.
Look, I know I’m getting ahead of myself, but if you’re feeling a little overwhelmed by the sheer amount of tools and specific chemical formulas you need to buy, don’t panic. I actually spent way too much time scrolling through endless forums trying to figure out which supplies wouldn’t fail after a month, but I eventually found some really solid advice over at hearthnhub that helped clear up the confusion. It’s worth a quick look just to make sure you aren’t wasting money on the wrong gear before you even start the job.
Once the bulk of the gunk is gone, you’re going to find those stubborn, tiny little bits of residue left behind. This is where most people give up, but if you want to succeed at preventing mold in bathtub seams, you have to get it completely clean. Use a plastic scraper or even an old credit card to buff out the remaining bits, then hit the area with a bit of rubbing alcohol. This ensures the surface is bone-dry and totally stripped of oils, which is the secret to making that new sealant actually stay put.
Silicone vs Acrylic Sealant Choosing the Best Sealant for Bathroom Tiles
So, you’ve done the hard work of removing old caulk from tub edges, and now you’re standing in the hardware aisle staring at a wall of tubes. It’s easy to feel overwhelmed, but the choice between silicone vs acrylic sealant is actually pretty straightforward once you know what you’re working with. If you want something that can handle the constant moisture and temperature swings of a shower without cracking or peeling, you want silicone. It’s basically the gold standard for preventing mold in bathtub seams because it’s non-porous and incredibly flexible.
Acrylic, on the other hand, is much easier to clean up with water and is generally cheaper, but it’s not built for the heavy-duty wet zones. It tends to shrink and crack over time, which is a recipe for disaster in a bathtub. If you’re looking for the best sealant for bathroom tiles in a high-moisture area, don’t skimp—go with a high-quality 100% silicone. It might be a little stickier and harder to work with, but it’ll save you from having to redo this whole messy job in six months.
Pro Tricks to Keep Your Caulking from Looking Like Total Garbage
- Don’t even think about touching that caulk gun until the surface is bone dry. If there’s even a hint of moisture lurking in the cracks, the new sealant is going to peel off in sheets within a month. Use a hairdryer if you have to, but get it dry.
- Stop trying to be a hero with the gun and focus on the “bead.” You want a steady, continuous squeeze. If you hesitate or pump the trigger like a maniac, you’re going to end up with a bumpy, uneven mess that looks amateur at best.
- The secret weapon isn’t the caulk itself—it’s the smoothing tool. Grab a small silicone smoothing tool or even just a finger dipped in a little soapy water to glide over the bead. It flattens everything out and gives you those clean, professional lines.
- Work in small sections. If you try to caulk the entire perimeter of the tub in one go, you’ll run out of time to smooth it before the stuff starts to skin over. Do one side, smooth it, and then move to the next.
- Clean your tools immediately. If you let silicone dry on your caulk gun nozzle or your smoothing tool, you’re basically throwing them in the trash. Keep a tub of soapy water or some mineral spirits nearby to wipe everything down the second you’re done.
The Quick Cheat Sheet for a Perfect Seal
Don’t even think about starting until that old, crusty caulk is 100% gone; if you layer new silicone over the old stuff, it’s going to peel off in a week.
Go with 100% silicone every single time for your tub—acrylic is fine for walls, but it just can’t handle the constant soaking and temperature swings of a bathtub.
Slow and steady wins the race; don’t try to fly through the bead, or you’ll end up with a wobbly, uneven mess that looks like a toddler did it.
The Golden Rule of Bathrooms
Look, you can buy the most expensive silicone on the shelf, but if you leave even a tiny bit of that old, slimy residue behind, you’re basically just sealing the mold inside to throw a party. Do the prep work right, or don’t bother doing it at all.
Writer
The Finish Line
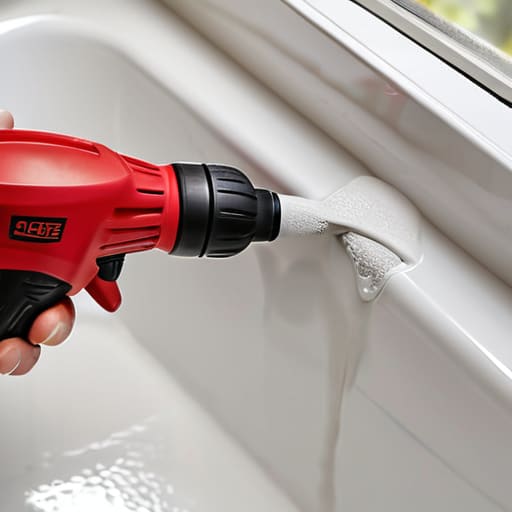
Look, I know it’s not exactly a glamorous Saturday afternoon, but getting that bathtub sealed correctly is one of those small wins that keeps your bathroom from turning into a disaster zone. We’ve covered the heavy lifting—from the messy job of scraping away that old, crusty gunk to picking the right silicone so you aren’t back here doing this again in three months. Just remember: the secret isn’t in the fancy tools, it’s in the prep work. If you take the time to clean the surface and get your bead steady, you’re already ahead of 90% of the DIYers out there. Don’t rush the drying process, or you’ll be fighting a losing battle against water damage before you even realize it.
At the end of the day, there is something incredibly satisfying about looking at a clean, seamless line where the tub meets the tile. You didn’t just fix a leak; you actually took control of your home instead of letting small problems snowball into expensive plumber bills. It might feel a little intimidating when you first squeeze that caulk gun, but once that first smooth bead goes down, you’ll realize you’re more capable than you thought. So, grab your supplies, put on some music, and get it done. Your future, dry, and mold-free self will definitely thank you.
Frequently Asked Questions
How long do I actually have to wait before I can use the shower again without ruining the seal?
The short answer? Don’t touch it. I know, it’s torture when you just want a hot shower, but if you blast that fresh bead with water too soon, you’re basically flushing your hard work down the drain. Most silicone sealants need at least 24 hours to fully cure. If you’re in a massive rush, check the tube—some fast-dry versions work in a few hours, but when in doubt, wait a full day.
Is there a trick to getting a perfectly smooth bead without making a massive, ugly mess?
The secret isn’t actually in the gun—it’s in the finger. Once you lay down a steady bead, don’t just wing it. Dip your finger in a little soapy water (a quick spray of Windex works too) and lightly drag it along the line in one continuous motion. The soap prevents the silicone from sticking to your skin, letting you smooth that messy ridge into a clean, professional-looking seam without the headache.
My old caulk keeps peeling off even after I scrape it—what am I doing wrong?
If it’s still peeling, you’ve likely got a microscopic layer of old residue or soap scum acting like a barrier. Even if it looks clean, that leftover film is killing your adhesion. Grab some isopropyl alcohol and a clean rag to scrub the area until it’s bone-dry and squeaky clean. If there’s any moisture or oil trapped in those tiny pores, that new caulk is never going to bite.