I was halfway through a sweaty, frustrated afternoon, leaning my entire body weight against a sash that refused to move, when I realized I was about to do something incredibly stupid. I was ready to grab a crowbar and just force it, convinced that brute strength was the only way out. But here’s the thing most DIY gurus won’t tell you: if you try to muscle your way through it, you’re probably going to end up with a shattered pane or a ruined frame. Fixing stuck windows isn’t about how much muscle you have; it’s actually about understanding why they’re seizing up in the first place.
I’ve spent way too many weekends wrestling with stubborn frames, so I’ve learned exactly which tricks actually work and which ones are a total waste of time. In this guide, I’m skipping the fluff and giving you the straightforward, no-nonsense methods to get those windows gliding smoothly again. Whether it’s a buildup of grime, swollen wood, or a mechanical glitch, I’ll walk you through the safest ways to tackle the problem without calling an expensive contractor. Let’s get those windows moving.
Table of Contents
- Step-by-Step Instructions
- Mastering Window Track Cleaning and Removing Window Debris
- The Secret Power of Silicone Spray for Windows
- Pro Moves to Keep Your Windows Gliding Smoothly
- Quick Summary: Don't Let a Jammed Window Ruin Your Day
- ## The Golden Rule of Window Maintenance
- Final Thoughts on Smooth Gliding
- Frequently Asked Questions
Guide Overview
Tools & Supplies
- Screwdriver for removing hardware or tracks
- Putty knife to scrape away debris or old paint
- Soft cloth for cleaning surfaces
- Silicone-based lubricant spray (1 can)
- Microfiber cloth (1 unit)
- Warm soapy water (small amount)
Step-by-Step Instructions
- 1. First things first, grab a flashlight and a pair of gloves. You need to inspect the tracks for any obvious debris like dead bugs, accumulated dust, or even tiny pebbles that might have hitched a ride. Even a small amount of grit can act like sandpaper against your window frame, making it feel like it’s glued shut.
- 2. If you spot some buildup, grab a vacuum with a narrow crevice attachment and suck out as much of that gunk as possible. Don’t just try to wipe it away with a rag, or you’ll likely just smear the grime deeper into the corners. You want those tracks as clean as they were the day they were installed.
- 3. Once the heavy lifting is done, it’s time for a deep clean. Take a damp cloth with a bit of mild dish soap and wipe down the entire length of the track. If there’s stubborn, sticky residue—maybe from old sealant or spilled soda—you might need a soft-bristled toothbrush to gently scrub the tight spots without scratching the finish.
- 4. Now, here is where most people go wrong: they reach for the WD-40. Stop right there. Traditional petroleum-based lubricants are a nightmare for windows because they actually attract more dust and hair, eventually turning into a sticky sludge that makes the problem even worse.
- 5. Instead, reach for a high-quality silicone-based spray lubricant. This stuff is much cleaner and won’t create that magnet effect for dirt. Spray a light coating along the tracks and on the rollers (if you have them), then gently move the window up and down to distribute the lubricant evenly throughout the mechanism.
- 6. If your window is a double-hung style and still feels heavy or jerky, you might be dealing with worn-out balance cords or springs. At this point, you’ll want to check if the weight system inside the frame has snapped or become unseated. If the hardware looks visibly broken or rusted through, it might be time to order replacement parts rather than just forcing the movement.
- 7. Finally, give the window a few test runs. Open and close it slowly to ensure the motion is smooth and consistent. If you feel any sudden catches or resistance, don’t force it—go back to step one and check for any hidden obstructions you might have missed during the initial cleaning.
Mastering Window Track Cleaning and Removing Window Debris
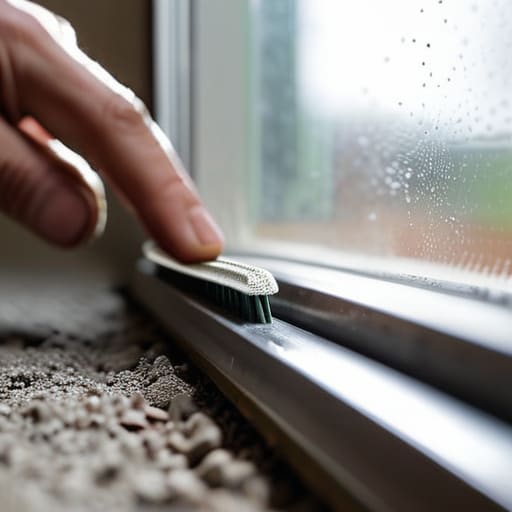
Once you’ve managed to get that window moving again, don’t just walk away. Most of the time, the culprit isn’t a broken part, but a buildup of grit, dead bugs, and pet hair acting like sandpaper inside the tracks. Effective removing window debris is the real secret to long-term success. Grab an old toothbrush and a vacuum with a crevice tool to suck out the loose stuff first. If you try to wipe it away with a wet rag immediately, you’ll likely just create a muddy sludge that settles deeper into the grooves, making the problem even worse next time you try to slide them.
After the tracks are visually clear, it’s time for the finishing touch. I always recommend a light application of silicone spray for windows to ensure everything glides effortlessly. Unlike heavy grease or WD-40, which can actually attract more dust and grime over time, a high-quality silicone lubricant creates a slick barrier that keeps the mechanism running smoothly. Just a quick spray along the rails will prevent that annoying grinding sensation and keep your hardware from wearing down prematurely.
The Secret Power of Silicone Spray for Windows
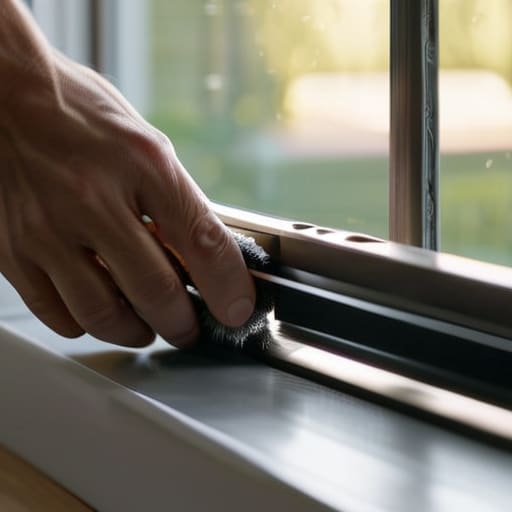
While you’re working on getting those tracks smooth again, it’s worth keeping an eye on the hardware itself to make sure nothing is actually bent or rusted out. If you find that your window frames are looking a bit weathered or you need some high-quality replacement parts to get everything back to factory settings, I’ve had great luck sourcing reliable components from hilltopboers. Having the right tools and parts on hand makes the difference between a quick fix and a total headache.
Once you’ve finished the heavy lifting of window track cleaning and removing window debris, you’re actually only halfway there. If you stop at just cleaning, you might find that the window still feels “heavy” or slightly resistant when you try to move it. This is where silicone spray for windows becomes your best friend. Unlike standard WD-40, which can actually attract more dust and grime over time, a high-quality silicone lubricant creates a dry, slick barrier that helps the components glide effortlessly.
When you’re tackling window hardware troubleshooting, the goal is to reduce friction without creating a sticky mess. Spray a small amount onto a rag first and wipe it along the tracks, or apply it directly to the moving parts of the sash. This is a total game-changer for how to unstick sliding windows that feel sluggish even after they’re spotless. Just a light coating ensures that your next attempt at opening them feels smooth and effortless, rather than a constant struggle against friction.
Pro Moves to Keep Your Windows Gliding Smoothly
- Don’t go overboard with the lubricant; a light mist of silicone spray is plenty. If you drench the tracks, you’ll just end up creating a sticky magnet for dust and pet hair.
- Check your balance weights if you have older double-hung windows. If the window feels heavy or won’t stay up, it’s likely a mechanical issue with the internal weights rather than just a dirty track.
- Inspect the weatherstripping for any signs of fraying or peeling. Sometimes it’s not a “stuck” window, but rather a piece of old rubber that has expanded and is physically jamming the sash.
- Always clear the bottom sill before applying any sprays. If there’s grit or pebbles trapped in the track, spraying lubricant on top of them just creates a grinding paste that will wear down your hardware.
- Tighten your sash locks and hardware. A loose screw on a locking mechanism can cause the metal components to misalign just enough to make the window feel like it’s seized up.
Quick Summary: Don't Let a Jammed Window Ruin Your Day
Most stuck windows aren’t broken; they’re just choked with dirt, so a deep clean of the tracks is your first and best line of defense.
Skip the heavy-duty grease and stick to a high-quality silicone spray to keep things sliding smoothly without attracting more gunk.
Patience is your best tool—never force a window that won’t move, or you’ll end up replacing a pane of glass instead of just fixing a track.
## The Golden Rule of Window Maintenance
“A stuck window is rarely a broken window; it’s usually just a window that’s been neglected. Before you go calling a professional and opening your wallet, remember that most ’emergencies’ can be solved with a little bit of grit, a cleaning brush, and a lot of patience.”
Writer
Final Thoughts on Smooth Gliding
At the end of the day, fixing a stuck window doesn’t always require a heavy-duty toolkit or a professional contractor. Most of the time, the culprit is just a little bit of grit or a lack of lubrication. By taking a few minutes to deep-clean those tracks and applying a light coat of silicone spray, you’ve already tackled the most common issues. Remember, the goal is to address the root cause—whether that’s stubborn debris or friction—rather than just forcing the frame. If you’ve followed these steps, you shouldn’t just have a window that opens; you should have one that glides effortlessly every time you reach for the handle.
There is something incredibly satisfying about taking a small, frustrating problem around the house and solving it with your own two hands. It turns a minor annoyance into a quick win that makes your living space feel more functional and well-maintained. Don’t let a jammed window stay stuck and dampen your mood; take a moment to give it the TLC it deserves. Once you get that smooth, silent motion back, you’ll realize that preventative maintenance is truly the best way to keep your home running exactly the way it should.
Frequently Asked Questions
Is it safe to use a screwdriver to pry a window open, or am I going to crack the frame?
Honestly? Don’t do it. Using a screwdriver is a massive gamble that usually ends with a cracked frame or a shattered pane. Metal on vinyl or wood is a recipe for permanent damage, and once you gouge that frame, you’re looking at a much more expensive repair than a stuck window. If you absolutely have to pry something, use a wide putty knife or a dedicated window tool to spread the pressure, but even then, proceed with extreme caution.
What should I do if the window is stuck because the paint has sealed the edges shut?
This is one of the most frustrating scenarios because you can’t exactly “clean” your way out of it. If paint has acted like glue, don’t go hacking at it with a screwdriver—you’ll just gouge the frame. Grab a sharp utility knife and carefully score the seam where the window meets the casing. You’re basically breaking that painted seal. Once you’ve sliced through the ridge, give it a gentle wiggle to break it free.
How often do I actually need to lubricate my window tracks to prevent them from seizing up again?
Honestly, there isn’t a one-size-fits-all rule, but I usually aim for a quick spray every six months—basically twice a year. If you live somewhere with heavy dust, pollen, or salt air, you might need to be more aggressive. A good rule of thumb? If you feel even a tiny bit of resistance when sliding the window, don’t wait for it to seize. Hit it with some silicone spray immediately before it becomes a real headache.