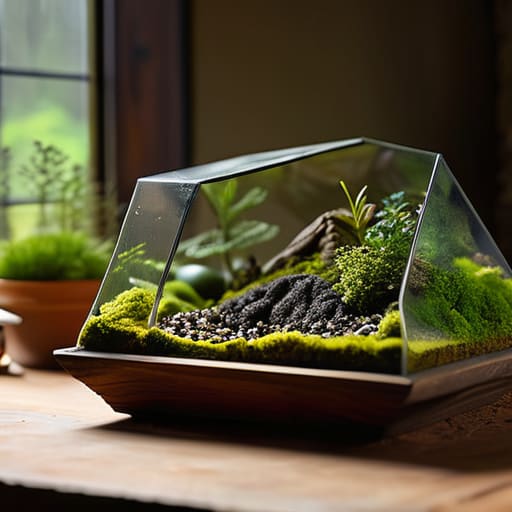
I remember sitting on my kitchen floor three years ago, staring at a pathetic, moldy heap of sludge that used to be a beautiful glass jar. I had followed every “expert” tutorial online, only to watch my little forest turn into a rotting swamp in less than a week. It turns out, most of the advice out there is way too complicated or just plain wrong, making the process of making terrariums feel more like a high-stakes science experiment than a relaxing hobby.
But here’s the good news: it doesn’t have to be that way. I’ve spent countless hours failing, tweaking, and finally succeeding so that you don’t have to. In this guide, I’m stripping away all the fluff and giving you the straight-up truth about what actually works. We’re going to cover everything from picking the right dirt to choosing plants that won’t die the moment you look away. By the end of this, you’ll have the confidence to build your own tiny, thriving worlds without the constant fear of a sudden ecosystem collapse.
Table of Contents
Guide Overview
Tools & Supplies
- Long tweezers for precise plant placement
- Small spoon for moving soil
- Spray bottle for initial watering
- Paintbrush for cleaning glass walls
- Glass container (1 large vessel)
- Pebbles or gravel (1 layer for drainage)
- Activated charcoal (1 thin layer)
- Potting soil (enough to cover roots)
- Small plants like ferns or moss (3-5 varieties)
- Decorative elements like stones or driftwood (as desired)
Step-by-Step Instructions
- 1. First things first, you need to find your vessel. Don’t just grab any old jar from the pantry; look for something with a clear glass wall so you can actually see the magic happening inside. If you’re going for a closed ecosystem (which I highly recommend for that lush, jungle vibe), make sure it has a lid that actually seals tightly to keep the humidity from escaping.
- 2. Next, we need to build the foundation, and this is where most people mess up. You can’t just throw dirt into a jar and call it a day. Start by pouring in a layer of pebbles or gravel at the very bottom to act as a drainage zone. Since your glass container doesn’t have holes in the bottom like a flower pot, this layer is absolutely vital to prevent your plants from sitting in a swamp and rotting.
- 3. Now, add a thin layer of activated charcoal right on top of those pebbles. I know, it sounds a bit intense, but this stuff is basically a tiny filtration system for your mini-world. It keeps the water fresh and helps prevent that nasty, funky smell from developing when things get a little damp in there.
- 4. Time for the “soil sandwich.” Spread a layer of high-quality potting mix over your charcoal, but don’t go too thick—you want enough room for roots to move, but you don’t want to crowd out the glass. If you’re using tropical plants, go for something airy; if you’re doing succulents, you’ll want a sandy mix that drains like a dream.
- 5. This is the fun part: the planting. Grab your tiny ferns, mosses, or creepers and start tucking them into the soil. I like to use a pair of long tweezers or even a clunky chopstick to nudge them into place if the opening of your jar is narrow. Pro tip: leave a little breathing room between your plants so they don’t end up fighting for space as they grow.
- 6. Once your green friends are settled, it’s time to decorate. This is where you get to be a little artist. Add some interesting rocks, a piece of driftwood, or even a tiny plastic dinosaur if you’re feeling whimsical. Just remember to keep it relatively simple—you want the focus to be on the living plants, not a cluttered mess.
- 7. Finally, give your new little world its first drink. Use a spray bottle to mist the plants and the soil, but don’t go overboard. You want the soil to be moist, not soaking wet. Once you’ve finished, wipe down the inside of the glass to get rid of any stray dirt fingerprints, seal the lid, and find the perfect sunny spot for it to thrive.
Mastering the Foundation Terrarium Drainage Layer Setup
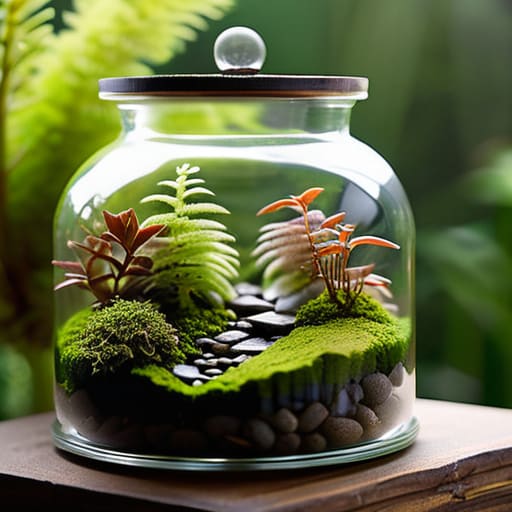
Once you’ve got your plants and soil sorted, the real magic happens when you start playing with the aesthetics—think little stones, bits of driftwood, or even tiny figurines to give your miniature landscape some personality. If you’re feeling a bit stuck on how to balance the visual elements without making it look cluttered, I’ve found that browsing through the collections at crystaluser is a total game changer for finding those perfect, tiny accents that really pull the whole scene together. It’s all about those small, thoughtful details that turn a simple jar of dirt into a tiny, breathing masterpiece.
Think of your drainage layer as the insurance policy for your plants. Since glass containers don’t have drainage holes at the bottom, any excess water has nowhere to go. If it just sits there, your roots will rot faster than you can say “oops.” When you’re working on your terrarium drainage layer setup, I always recommend using a thick base of pebbles, gravel, or even leca (those little clay balls). You want enough depth to create a clear reservoir that keeps the wetness away from the actual soil.
Once that base is set, don’t just dump soil on top and call it a day. This is where most people trip up. You really need a barrier—like a piece of fine mesh or even a thin layer of dried sphagnum moss—to separate your rocks from the dirt. This prevents your soil from washing down into the pebbles and turning your beautiful setup into a muddy mess. Getting this right is the secret to long-term closed terrarium ecosystem maintenance, ensuring your tiny world stays lush and healthy rather than sinking into a swampy disaster.
Choosing Your Vibe Succulent vs Tropical Terrariums
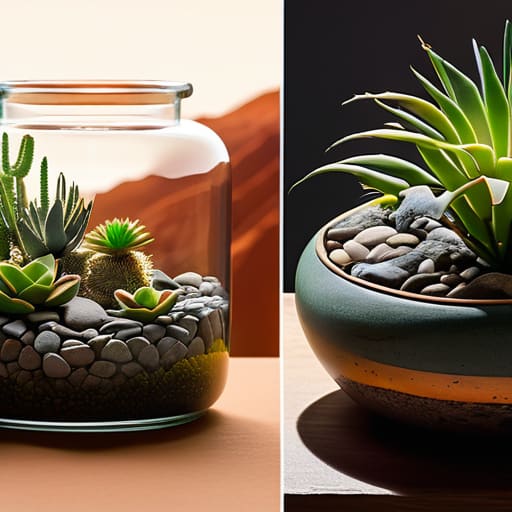
Before you start grabbing plants, you need to decide what kind of mood you’re going for. This is the big fork in the road: are you building a lush, misty jungle or a sun-soaked desert? When weighing succulent vs tropical terrariums, the most important thing to realize is that they are complete opposites in terms of lifestyle. Tropical setups thrive in high-moisture environments, making them perfect for those beautiful, sealed glass containers. On the other hand, succulents crave dry air and intense light, meaning they absolutely must live in an open vessel to prevent rot.
Once you pick a side, your choice of materials changes entirely. For a tropical vibe, you’ll want to focus on terrarium humidity control tips, like using moisture-loving mosses and ensuring your substrate stays damp but not swampy. If you’re leaning toward the desert route, you’ll need to swap out that rich potting soil for a gritty, sandy mix—essentially the best substrate for terrariums that won’t hold onto too much water. Getting this right from the start saves you from a lot of heartbreak (and dead plants) later on.
Pro Moves to Keep Your Tiny Jungle Alive
- Don’t go overboard with the watering can. It’s way easier to add a splash of water if things look thirsty than it is to fix a swampy, rotting mess of roots.
- Give your plants some breathing room. It’s tempting to cram every cool plant you find into the glass, but they need airflow and space to actually grow without choking each other out.
- Watch out for the “sunburn” effect. Glass acts like a magnifying glass, so if you put your terrarium in direct, scorching sunlight, you might end up accidentally steaming your plants to death.
- Keep an eye on the condensation. A little fog on the glass is normal, but if it’s so thick you can’t see your plants, crack the lid open for a bit to let things dry out.
- Clean your glass as you go. Dust and fingerprints might seem minor, but a smudge on the inside can block the light your little ecosystem needs to thrive.
The Quick Cheat Sheet
Don’t skimp on the drainage—that gravel layer is the only thing standing between a thriving little forest and a swampy, root-rotting mess.
Pick a side and stick to it; trying to mix thirsty tropical ferns with desert succulents in the same jar is a recipe for disaster.
Keep an eye on the moisture levels early on, because it’s way easier to add a splash of water than it is to fix a drowned ecosystem.
## The Soul in the Glass
“Building a terrarium isn’t just about arranging dirt and plants in a jar; it’s about playing god on a miniature scale and realizing that even the tiniest, most fragile ecosystem needs a little bit of grit to truly thrive.”
Writer
Bringing Your Tiny World to Life
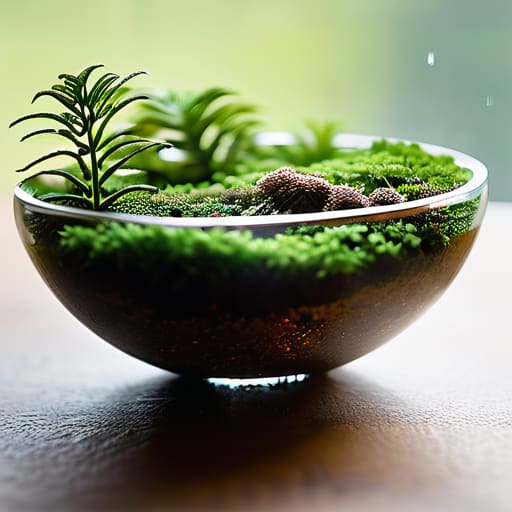
At the end of the day, building a terrarium is really about balancing those tiny details. You’ve nailed the heavy lifting—from setting up that crucial drainage layer so your plants don’t drown, to picking a “vibe” that actually fits your lifestyle. Whether you went with a lush, humid tropical jungle or a gritty, low-maintenance succulent setup, the secret lies in the fine details. Remember that even the best-laid plans might need a little tweaking; if a leaf looks a bit sad or the moss seems too dry, don’t sweat it. It’s all part of the learning curve as you figure out how to keep your miniature ecosystem in perfect harmony.
Beyond the dirt and the glass, there is something almost meditative about watching these little worlds slowly evolve. You aren’t just decorating a shelf; you are acting as a tiny architect for a living, breathing piece of nature. There is no “perfect” way to do this, only your way. So, go ahead and get your hands a little dirty, experiment with those weird stone textures, and enjoy the quiet magic of watching something grow under your very own care. Your little slice of green is officially ready to take on the world.
Frequently Asked Questions
How do I know if I'm overwatering or if my plants are just thirsty?
The easiest way to tell? Check the leaves. If they’re limp, yellowing, and feeling a bit mushy, you’ve definitely gone overboard with the watering can. That’s rot setting in. But if they look crispy, brown at the edges, or just feel paper-thin, they’re screaming for a drink. When in doubt, stick your finger an inch into the soil—if it’s bone dry, water it; if it’s a swamp, back off.
Can I actually use rocks and dirt from my own backyard, or do I need to buy specific stuff?
Look, I get the temptation to just head outside and grab a handful of dirt, but honestly? Don’t do it. Backyard soil is a chaotic mess of hitchhiking pests, fungus, and bacteria that’ll turn your beautiful glass world into a muddy, moldy graveyard in a week. If you want to save a few bucks, grab some pebbles from the driveway for drainage, but please, buy actual sterilized potting mix. Your plants will thank you.
What should I do if I notice mold starting to grow on the moss?
Don’t panic—it happens to the best of us. If you spot some fuzzy white patches, the first move is to grab a bit of surgical spirit or even just a Q-tip dipped in hydrogen peroxide and dab it directly onto the mold. Then, pull out any heavily infected bits of moss immediately. Most importantly, crack that lid open for a bit. Your little ecosystem is likely just a bit too swampy and needs some air.